Trampoline Installation Instructions
Parts List
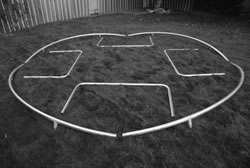
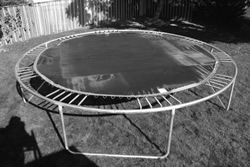
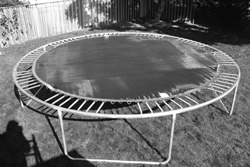
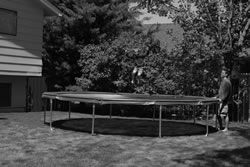
Step 1. Lay out the 4 frame sections in a circle with the leg stubs facing the ground. Do not connect the joints.
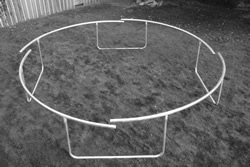
Step 2. Insert legs into the leg stubs, but do not connect the frame joints. The legs go across the joints.
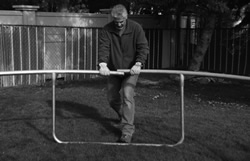
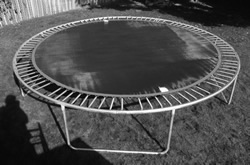
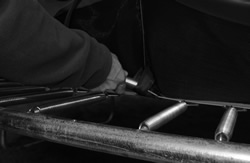
Step 3. Once standing, to get the joints together, put a foot on the leg, grab on each side of the joint and pull back. Put the reduced end inside the larger end and push away. Repeat for other joints.
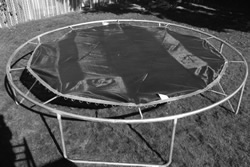
Step 4. Spread out the jump bed on the ground inside the frame. Attach a spring to the jump bed v-ring first, then to the frame. Attach every 10th spring the first time around the trampoline. On the second round, add 2 springs next to the original 10. Repeat adding 2 springs to each area, working around the trampoline 4 more times.
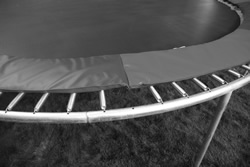
Step 5. Before adding the last 10 springs, spread the frame pad on the trampoline, putting the seams of the pad over the area where the last springs are to be attached. Place the spring through the inner loop on the bottom side of the pad, then tie to the frame with the outer ties. Make sure pad warning label is visible.
Step 6. Place the two warning labels on upright part of leg on opposite sides of trampoline.
Step 7. Jump safely and have fun!
Step 7. Jump safely and have fun!
Enclosure Installation Instructions
Parts List
8 - Top uprights w/ a bend, reduced end and top mounting ring sleeve.
8 – Bottom upright w/ plain ends.
8 – Curved top ring sections w/ one open end and one reduced end.
1 – Net
22 – Foam tubes
16 – Sets of upright clamps
16 – 3/8” x 2.5” Carriage Bolts
16 – Nuts w/ nylon locking ring. ( nylock nut)
24 – Self drilling screws
7 – 3/16” x 75” rope
Tools Needed
9/16” Wrench, drill w/ Philips head screw driver, tape measure, razor knife, felt marker and safety glasses.
Installation Instructions
Step 1. Installing bottom of net
Lay the net out on the trampoline, placing entry area of net close to one of the trampoline leg uprights. This will make it easier to get on and off when the enclosure is installed. The yellow vinyl border is the top of the net.
Begin lacing the bottom of the net to the trampoline jump bed v- rings, using the 3/16” rope. Tie the end of the rope to one of the rings to start and lace through the bottom of the net, just above the bottom border and then through the next ring. Repeat this process until you get to the end of the rope and tie it off to a ring. (Sometimes, the use of a small screw driver will help spread the net so the rope may go through better.)
Repeat this process until the entire bottom of the net is secure.
Step 2. Installing bottom uprights
Lay all eight bottom upright pcs. Flat and measure 20” from one end and place a mark on all eight pcs. Each upright will be mounted using two sets of clamps, 2 – 3/8” x 2.5” carriage bolts, 2 – nylock nuts
Put the first clamp together just below the trampoline frame on one of the trampoline leg uprights, using one nylock nut. DO NOT tighten yet. Just get the treads started. Place the bottom upright through the clamp until the 20” mark is even with the top of the trampoline frame. ( There should be 20” below the top of the trampoline frame and 28” above the trampoline frame. Tighten nut with 9/16” wrench.
Place the second clamp 1/8” below the bottom of the upright to cover the end of the pipe. Use the nylock nut and tighten.
Repeat this process for all bottom uprights.
When all eight uprights are properly installed, take 4 foam tubes and cut them in half, 24 inches from either end, with a razor knife or sharp knife. Place these 24” sections on the uprights mounted to the trampoline.
Step 3. Installing top uprights
Place a 48 inch foam tube on each top upright section and place the upright in the bottom upright section. When all eight are in place, you are ready to move on to the top ring. (All joints will be secured with a self drilling screw later in the installation process.)
Step 4. Installing top ring
Lay out curved top ring sections around trampoline. (Do not put together) From on the trampoline, put one curved section through the mounting ring at the top of the uprights, until it is about half way. Go to the next upright and place the next section through. Place the reduced end of the first section into the open end of the second section. Repeat this until all eight sections are together.
Now, you will be securing the joints with the self drilling screws. Wear protective glasses to avoid the shavings getting in your eyes. Drill one screw per joint. It is easiest to drill upward. After the eight joints have been secured, drill one self drilling screw in the top mounting rings and the curved top ring. Climb off the trampoline and secure the upright joints. Lift the top foam tube until you see the joint. Drill one self drilling screw about one inch down from the joint. Repeat for all eight uprights.
Step 5. Installing foam tubes to top ring
The remaining foam tubes will need one side split to go over the top rings. Use a sharp razor knife and be careful not to cut yourself. Once foam tubes have been split, take one tube and place over top ring. The split should be facing in and slightly down. (Do not put the split facing out.)
When you come to an upright, cut a notch on the bottom part of the split foam tube, just big enough to fit around the upright. Once the first two tubes are in place, continue adding the rest of the tubes. Some tubes will need a notch and some will not. The last foam tube may need to be trimmed to fit.
Step 6.) Tying the net to the top ring.
Once all the foam tubes have been installed, begin tying the net to the top ring. Start at the entry area and work your way around. Make sure you are pulling the net straight up and not off at an angle.
The trampoline with enclosure is now ready to be used. Follow all trampoline and enclosure guidelines for safe use.
The enclosure is not designed to be used as a rebound device. This type of use will wear the enclosure prematurely and could cause injury.
Weight Limit: 300 lbs.
CAUTION: Do not hang on net. Do not purposely bounce against net. They are not designed for that type of use and may cause premature wear or cause an injury.

